
Wild Interloper
Docs
Guides, FAQs and everything else you need before you descend.
Getting Started
Ten floors lie below. A Demon Knight guards the 5th, and the Skull King waits on the 10th. This guide covers everything you need to survive the descent: the classes, the monsters, the bosses, every weapon, piece of gear, trinket and consumable, and the rules behind combat.
What Kind of Game Is This?
Into the Depths is a turn-based dungeon crawler. Every floor is randomly generated, so no two runs are the same. You pick a class, descend through ten floors, and try to defeat the Skull King at the bottom.
- Turn based. Nothing moves until you do. Each turn you get 2 Action Points and 2 Movement Points.
- Permadeath. If your character dies, that save slot is wiped and the run is over. (A Phoenix Feather can save you once.)
- Three save slots. You can have three separate runs going at once.
- Saving. The game saves when you take the stairs down to a new floor, and you can Save & Exit from the pause menu.
Your First Few Minutes
- Pick a class. The Knight is the most forgiving for new players.
- Two Keys are dropped next to you at the start of every new run. Pick them up; they open locked doors.
- Read the sign near the entrance on Floor 1.
- Walk into enemies to attack them. Watch your life bar and drink a potion before it gets low.
- Find the stairs and stand on them, then press E (or A / Cross) to go down.
The Goal
- Floors 1 to 4: learn the ropes, collect gear, level up.
- Floor 5: defeat the Demon Knight. The stairs down stay hidden until it falls.
- Floors 6 to 9: the dungeon gets much harder. Elites and Mimics become common.
- Floor 10: defeat the Skull King to win.
Controls
Keyboard & Mouse
| Action | Key |
|---|---|
| Move (walk into an enemy to attack it) | WASD or Arrow keys |
| Attack an adjacent enemy (diagonals too) / cast with a wand | Left click |
| Throw the item in your hand (rocks, knives, bombs, arrows) | Right click |
| Pick up, open chests, read signs, use the stairs | E or Space |
| Use your class ability | Q (or click the ability slot on the hotbar) |
| Search for hidden doors | F |
| Inventory | I |
| Map | M |
| Character stats | U |
| Show all controls | H |
| Toggle fullscreen | F1 |
| Pause menu | Esc |
Controller
Xbox, PlayStation, Switch and most generic controllers are supported. The game switches automatically between keyboard/mouse and controller depending on which one you touched last, and on-screen button prompts change to match the controller you're holding.
| Action | Xbox | PlayStation |
|---|---|---|
| Move | Left stick / D-pad | Left stick / D-pad |
| Cycle target | LB | L1 |
| Pick a target in a direction | Flick the right stick | Flick the right stick |
| Attack / cast at the target (diagonals too) | RB | R1 |
| Throw the item in your hand at the target | RT | R2 |
| Pick up, open, read, use stairs | A | Cross |
| Class ability | B | Circle |
| Search for hidden doors | X | Square |
| Inventory | Y | Triangle |
| Map | View / Select | Share / Select |
| Character stats | LT | L2 |
| Pause menu | Menu / Start | Options / Start |
Targeting: the nearest enemy is picked for you automatically. A reticle shows who you're locked on to. It turns red when your next attack will actually connect (the enemy is in reach, or you're holding a wand).
Inventory on a Controller
When the inventory is open, a slot cursor replaces the mouse. The stick or D-pad jumps from cell to cell, and across to your weapon, armor, shield and trinket slots.
| Action | Xbox | PlayStation | Mouse equivalent |
|---|---|---|---|
| Select, pick up, place | A | Cross | Left click |
| Use the selected item | X | Square | Right click |
| Drop the stack under the cursor | RB | R1 | Drag out |
| Take half a stack | LT + A | L2 + Cross | Alt + click |
| Sort the bag | LB | L1 | L |
| Put back what you're carrying, otherwise close | B | Circle | |
| Close | Y | Triangle |
The Hotbar
The hotbar at the bottom of the screen shows:
[Weapon] [Off-hand] [Armor] [Trinket] [Trinket] | [Class Ability]
- Each slot shows what's equipped, with stack size and a damage or protection badge.
- The off-hand slot greys out while you hold a two-handed weapon, and turns into a quiver when you hold a bow with arrows in it.
- The ability slot shows your class icon, its magic cost, a radial cooldown with turns left, and the button that fires it.
- Hover over a slot with the mouse to see a tooltip. Click the ability slot to use it.
Character Classes
Choosing a Class
There are four classes. Each has different starting stats, a starting kit, a passive bonus and a unique ability. Loot is also biased toward your class: spellcasters find more staves, wands and robes, and the Knight finds more steel.
| Class | Life | Strength | Agility | Magic | Protection | Vision | Ability | Difficulty |
|---|---|---|---|---|---|---|---|---|
| Knight | 10 | 2 | 2 | 2 | 2 | 4 | Cleave | Easy |
| Necromancer | 8 | 1 | 2 | 5 | 0 | 4 | Raise Dead | Medium |
| Mage | 7 | 1 | 1 | 10 | 0 | 4 | Arcane Storm | Medium |
| Naked | 3 | 1 | 1 | 1 | 0 | 2 | Pray | Brutal |
All classes start with 2 Action Points and 2 Movement Points.
Knight
William the Knight
A sturdy fighter who wins by standing in the thick of it.
- Starting kit: Sword (in hand), Leather Armor, Wooden Shield, 2 Healing Potions, 1 Magic Potion.
- Passive: Bulwark. +1 Protection while holding a shield.
- Ability: Cleave. Strike every enemy around you, diagonals included, with +1 damage.
- Cost: no magic. Cooldown: 8 turns.
- Costs one action no matter how many enemies you hit.
- Does nothing (and isn't spent) if no enemy is next to you.
- Magic regeneration: none (unless you wear a Mana Crystal).
- Loot bias: 55% of arcane gear is re-rolled into weapons and armor.
Tips: Fight in doorways and corridors so only a few enemies can reach you, then Cleave when you're surrounded. Keep a shield equipped for Bulwark unless a two-handed weapon is clearly better.
Necromancer
Job the Necromancer
Commands the dead and wears enemies down with poison.
- Starting kit: Dagger (in hand), Bone Wand, Healing Potion, Magic Potion, Antidote.
- Passives:
- Dark Touch: 25% of your normal hits also poison the target.
- Soul Harvest: every kill heals you for 1.
- Regains 1 magic every 8 turns.
- Ability: Raise Dead. Skeletons claw out of the ground and fight for you, then crumble.
- Cost: 4 magic. Cooldown: 16 turns.
- How many rise: 1–2 at first, 1–3 from level 3, 2–3 from level 6. Each Staff of the Grave, Lich Staff or Skull Talisman adds one more.
- How long they last: 10 turns + your level, plus bonuses from gear.
- From level 5, each one has a 1 in 3 chance to be a tougher Risen Knight.
- Maximum 5 undead at once.
- Loot bias: 70% of steel weapons, shields and heavy armor are re-rolled into necromantic or arcane gear.
Undead allies:
| Ally | Life | Strength | Protection | Notes |
|---|---|---|---|---|
| Risen Skeleton | 4 + your level | 1 + (level ÷ 3) | 0 | Moves 2 tiles |
| Risen Knight | 8 + your level | 2 + (level ÷ 3) | 1 | From level 5 |
- Undead block monsters and attack the nearest enemy they can see.
- Walking into one of your undead swaps places with it.
- Monsters may attack your undead instead of you.
- Undead give no XP or loot, and they crumble when you leave the floor.
Tips: Raise your undead before a fight starts so they soak the first hits. Gear like the Book of the Dead, Necromancer's Shroud and Bone Totem makes your army last longer and hit harder.
Mage
Jacob the Mage
Fragile, but deals heavy damage from range.
- Starting kit: Frail Wand (in hand), Mage Robe, Dagger, 2 Magic Potions, 1 Healing Potion.
- Passives:
- Spells deal +1 damage.
- Regains 1 magic every 5 turns.
- Ability: Arcane Storm. Lightning leaps from you through visible enemies. Ignores armor.
- Cost: 3 magic. Cooldown: 5 turns.
- Hits up to 3 enemies, plus 1 more every 4 levels (maximum 5).
- Damage per enemy: 2 + (your level ÷ 2), plus any spell damage bonus from gear.
- Loot bias: 70% of steel weapons, shields and heavy armor are re-rolled into staves, wands, robes and books.
Tips: Magic damage ignores armor, which makes the Mage great against heavily armored enemies like Mecha Golems. Keep your distance, and save Arcane Storm for groups.
Naked
Jenkins the Naked
An old man with three rocks and a tomato. Brutal on purpose.
- Starting kit: 3 Rocks (in hand), 1 Tomato.
- Passive: Nothing to lose.
- +50% XP.
- Monsters have +25% life and notice you more easily.
- No magic regeneration.
- Only +1 max life per level (other classes get +2).
- Ability: Pray. Heal 2 life. One time in four, the gods answer and smite the nearest enemy with holy fire for 3 + (your level ÷ 3) damage.
- Cost: no magic. Cooldown: 30 turns.
- Loot bias: none. Take what you find.
Tips: This is a challenge class. Avoid fights you don't need, throw rocks from a distance, and pick up every piece of gear you can.
Combat
Turns, Actions and Movement
- Each turn you have Action Points (AP) and Movement Points (MP). Every class starts with 2 of each.
- Moving one tile costs 1 MP. Attacking, casting, throwing or using your ability costs 1 AP.
- Your turn ends when you run out of either AP or MP.
- Monsters take their turns in order of Consciousness. Higher acts first.
Attacking
- Melee: walk into an enemy or click it. You can hit diagonally with a click or with the controller's attack button. Walking into an enemy only attacks in straight lines.
- Reach weapons (Spear, Halberd, Frost Trident) hit enemies up to 2 tiles away, straight or diagonal.
- Wands and staves: click a visible enemy to cast a bolt. This costs magic (usually 1, sometimes 2).
- Throwing: right-click (or RT) throws whatever is in your hand: rocks, knives, javelins, bombs, flasks.
- Bows: put arrows in your off-hand slot, hold a bow, then throw to shoot. The bow's damage is added to the arrow's.
Damage
- Your melee damage = weapon damage + your Strength. Bare fists deal just your Strength.
- To hit: roll a 20-sided die. You hit if the roll is 19 or lower, adjusted by your Agility minus the target's Agility. A roll of 1 always hits and a roll of 20 always misses.
- Equal Agility = 95% chance to hit.
- Every point of Agility you have over the target makes you harder to miss with, and every point you're behind makes you miss more often.
Damage Types
| Type | Blocked by armor? | Extra effect |
|---|---|---|
| Normal | Yes | None |
| Fire | No, ignores armor | Burns |
| Freeze | Yes | Freezes the target for 1 turn |
| Poison | Yes | Poisons the target (damage over time) |
| Magic | No, ignores armor | None |
Holy is a special tag on the Holy Septre, Angel Sword, Silver Arrows, Holy Water and the Naked class's divine smite. Holy damage is doubled against the Skull King.
Protection (Armor)
- Every point of Protection gives each point of incoming damage an 8% chance to be blocked, up to a maximum of 60% (at 8 Protection, rounded down).
- Protection works against Normal, Freeze and Poison damage.
- Fire and Magic ignore Protection completely.
- If every point of a hit is blocked, you'll see "Blocked!".
Status Effects
| Effect | What it does | Caused by |
|---|---|---|
| Poisoned | Takes 1 damage per turn for 2 turns. Protection can block poison ticks. | Poison weapons, Cave Spiders, Plague Doctors, Demon Tribesmen, the Skull King, Rotten Tomatoes |
| Frozen | Monsters lose their whole turn. You can't move, but keep 1 action (to drink a potion or attack). | Freeze weapons and wands (1 turn), Frost Wraiths, Tome of Frost and Frost Bomb (3 turns) |
| Burning | Fire damage ignores armor | Fire weapons, Fire Imps, the Demon Knight, Fire Flasks, Bombs |
- Antidote cures poison. Elixir cures all ailments.
Experience and Levelling Up
- Kill monsters to earn XP. Elite monsters give bonus XP.
- XP needed for the next level = 30 × your current level + 20 (Level 1→2: 50 XP, 2→3: 80 XP, 3→4: 110 XP, …). Extra XP carries over.
- Every level up:
- +2 max life (Naked: +1).
- Full heal.
- +1 Strength on every even level (2, 4, 6…).
- +1 Agility on every third level (3, 6, 9…).
- Mage and Necromancer: +1 Magic.
- Class abilities also get stronger as you level (see Character Classes).
The Dungeon
The Ten Floors
| Floor | Name | Monsters you'll meet |
|---|---|---|
| 1 | The Cellar |  Green Slime, 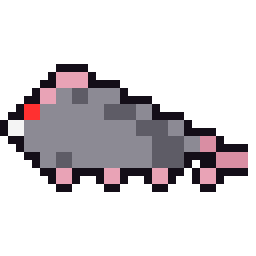 Rat,  Cave Bat |
| 2 | Rat Warrens | Rat,  Blue Slime, 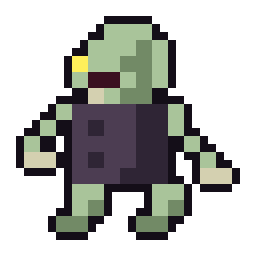 Ghoul, Cave Bat, 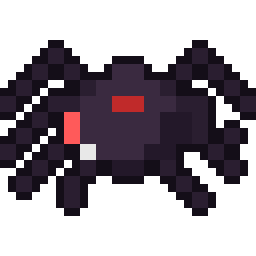 Cave Spider |
| 3 | Fungal Grotto | Ghoul, Blue Slime, 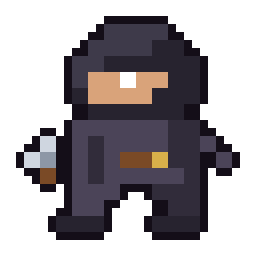 Thief, Cave Spider, 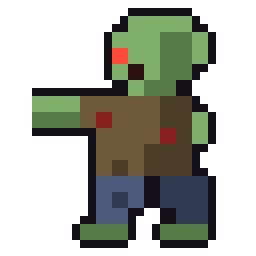 Zombie,  Mimic |
| 4 | Flooded Crypt | Zombie, Thief, 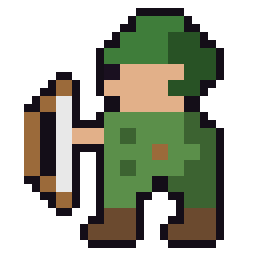 Realm Archer, 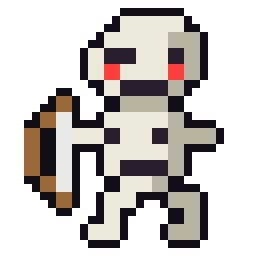 Skeleton Archer, 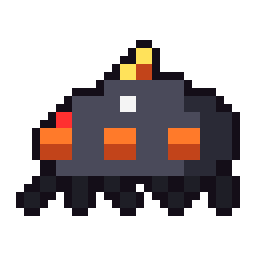 Blast Beetle, Mimic |
| 5 | Hall of the Demon Knight | 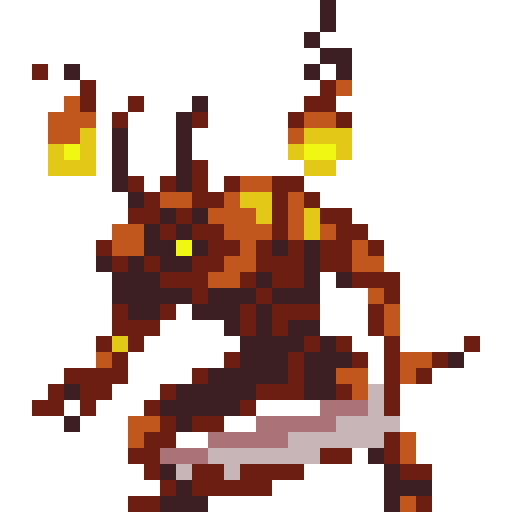 Demon Knight (boss), 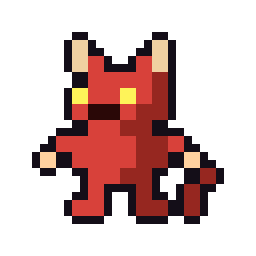 Demon Child, 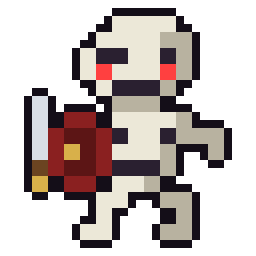 Skeleton Warrior, 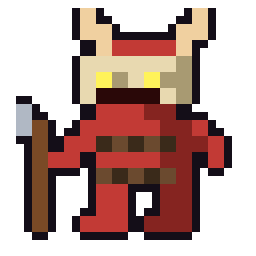 Demon Tribesmen, Blast Beetle, Mimic |
| 6 | Bone Gallery | Skeleton Warrior, Skeleton Archer, 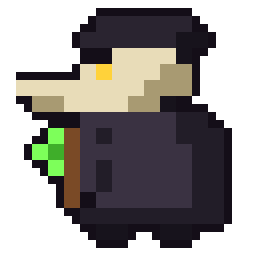 Plague Doctor, Blast Beetle, 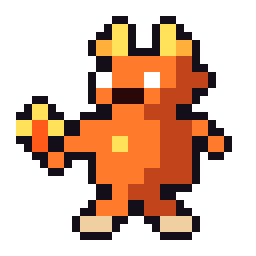 Fire Imp, Mimic |
| 7 | The Forgotten Forge |  Mecha Golem, 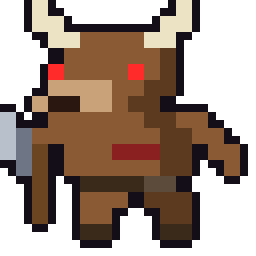 Minotaur, Fire Imp, Demon Tribesmen, Skeleton Warrior, Realm Archer, Mimic |
| 8 | Frozen Depths |  Frost Wraith,  Licker, Ghoul, 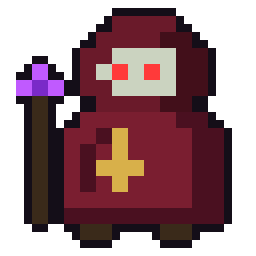 Cultist, Mimic |
| 9 | The Abyss | Demon Child, Demon Tribesmen, Cultist, 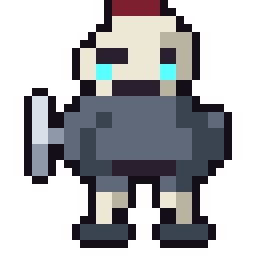 Bone Knight, Licker, Frost Wraith, Mimic |
| 10 | Throne of the Skull King | 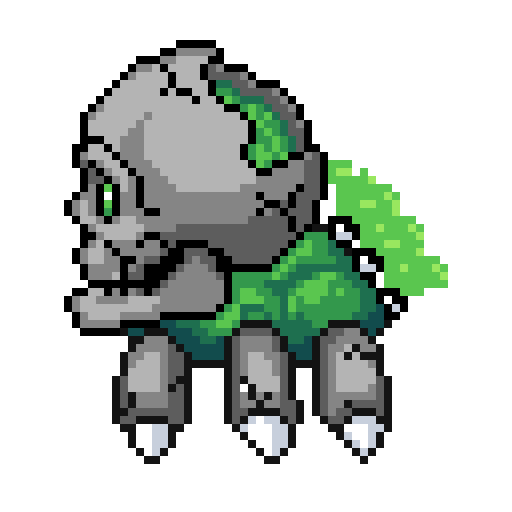 Skull King (final boss), Bone Knight, Cultist, Licker |
From Floor 3 down, each floor has more monsters than the last: Floor 3 has 12% more than the base count, rising to 84% more on Floor 9.
Things You'll Find on Every Floor
- Chests: 5–8 per floor (2 on Floor 10). Gold chests have better loot, and get more common the deeper you go.
- Loose loot: items lying on the floor.
- Doors and locked doors: locked doors need a Key, which is used up.
- Hidden doors and rooms: press F (or X / Square) to search for hidden doors nearby.
- Boulders: break them (Bombs and Rocks can crack them) to find rubies.
- Rubies and jewels: currency for the Blacksmith.
- Lamps: light up the area around them.
- Campfires: stand near one to heal. Each campfire only holds 5, 7 or 10 life worth of healing before it runs out.
- Signs: hints for the floor. Press E to read.
- Stairs down: always reachable without keys or searching. On Floors 5 and 10 they're hidden until the boss is dead.
The Blacksmith (Shop)
A Blacksmith sets up near the entrance on Floors 2 to 9. He trades for Rubies, Jewels and Humanity.
| Offer | Price |
|---|---|
 Healing Potion | 6 Rubies |
 Antidote | 3 Rubies |
 Bomb ×2 | 5 Rubies |
 Throwing Knife ×4 | 4 Rubies |
 Key ×2 | 5 Rubies |
 Tome of Mending | 8 Rubies |
 Mace | 12 Rubies |
 Magical Mace | 6 Jewels |
 Elixir | 4 Jewels |
 Heart Crystal | 8 Jewels |
| Blessing (full heal) | 15 Humanity |
Gold: the Blacksmith trades 20 Gold Coins for a Ruby and 5 Gold Bars for a Jewel.
Mimics
From Floor 3 onward (except Floor 10), 1–2 of the "chests" on each floor are Mimics. They look exactly like chests until you stand next to one or hit it. See the Bestiary.
Bestiary
How to Read This Chapter
Stats are base values. Monsters get tougher on deeper floors, and some spawn as Elites (see the next section).
- Life: hit points.
- Str: Strength. Roughly how much damage it deals.
- Agi: Agility. Affects hitting and dodging.
- Prot: Protection (armor).
- Move: tiles it can move per turn.
- Vision: how far it can see you.
Monster Scaling & Elites
Depth scaling (all non-boss monsters):
- Life goes up on every floor. From Floor 3 there's an extra multiplier, rising from +12% on Floor 3 to +96% on Floor 10.
- Strength: +1 every 3 floors.
- Agility goes up from Floor 6.
- Protection: +1 from Floor 7.
- Vision: +1 from Floor 5. They notice you from further away.
- Playing Naked: +25% life and better awareness on top of all this.
Elite monsters (from Floor 3):
- Chance to spawn as an Elite: about 7% on Floor 3, rising to about 16% on Floor 9.
- Elites have a gilded look and "Elite" in front of their name.
- +40% life, +1 Strength, +1 Agility.
- Worth bonus XP, and they always drop something good.
Early Floors (1–3)
Green Slime
| Life | Str | Agi | Prot | Move | Vision | Floors |
|---|---|---|---|---|---|---|
| 2 | 1 | 1 | 0 | 1 | 8 | 1 |
The first thing you'll fight. Slow and weak, but it comes in numbers.
Rat
| Life | Str | Agi | Prot | Move | Vision | Floors |
|---|---|---|---|---|---|---|
| 1 | 1 | 1 | 0 | 1 | 8 | 1–2 |
Dies in one hit, but sees you from far away.
Cave Bat
| Life | Str | Agi | Prot | Move | Vision | Floors |
|---|---|---|---|---|---|---|
| 2 | 1 | 3 | 0 | 3 | 7 | 1–2 |
Flutters around erratically and bites when it's next to you. High Agility makes it hard to hit.
Blue Slime
| Life | Str | Agi | Prot | Move | Vision | Floors |
|---|---|---|---|---|---|---|
| 3 | 1 | 1 | 0 | 1 | 8 | 2–3 |
A tougher slime.
Ghoul
| Life | Str | Agi | Prot | Move | Vision | Floors |
|---|---|---|---|---|---|---|
| 3 | 1 | 1 | 0 | 2 | 6 | 2, 3, 8 |
Moves 2 tiles a turn. It closes distance quickly.
Cave Spider
| Life | Str | Agi | Prot | Move | Vision | Floors |
|---|---|---|---|---|---|---|
| 3 | 1 | 2 | 0 | 2 | 6 | 2–3 |
Poison bite. Carry an Antidote.
Thief
| Life | Str | Agi | Prot | Move | Vision | Floors |
|---|---|---|---|---|---|---|
| 4 | 1 | 2 | 0 | 1 | 8 | 3–4 |
Has 2 actions per turn, so it can hit you twice.
Zombie
| Life | Str | Agi | Prot | Move | Vision | Floors |
|---|---|---|---|---|---|---|
| 5 | 2 | 1 | 0 | 1 | 5 | 3–4 |
Slow and short-sighted, but hits harder than anything before it.
Middle Floors (4–7)
Realm Archer
| Life | Str | Agi | Prot | Move | Vision | Floors |
|---|---|---|---|---|---|---|
| 3 | 1 | 1 | 0 | 1 | 6 | 4, 7 |
Shoots arrows from range. Close the gap or break line of sight.
Skeleton Archer
| Life | Str | Agi | Prot | Move | Vision | Floors |
|---|---|---|---|---|---|---|
| 3 | 2 | 1 | 0 | 1 | 6 | 4, 6 |
A harder-hitting archer.
Blast Beetle
| Life | Str | Agi | Prot | Move | Vision | Floors |
|---|---|---|---|---|---|---|
| 2 | 2 | 1 | 0 | 2 | 6 | 4–6 |
Runs straight at you and explodes, dealing fire damage in a 3×3 area and destroying itself. Kill it from range, or step away before it reaches you. Fire ignores armor.
Demon Child
| Life | Str | Agi | Prot | Move | Vision | Floors |
|---|---|---|---|---|---|---|
| 3 | 2 | 1 | 0 | 1 | 6 | 5, 9 |
Small demons. The Demon Knight summons them in its second phase.
Skeleton Warrior
| Life | Str | Agi | Prot | Move | Vision | Floors |
|---|---|---|---|---|---|---|
| 6 | 2 | 1 | 1 | 2 | 6 | 5–7 |
Armored and fast. The Skull King raises these.
Demon Tribesmen
| Life | Str | Agi | Prot | Move | Vision | Floors |
|---|---|---|---|---|---|---|
| 5 | 2 | 1 | 0 | 1 | 5 | 5, 7, 9 |
Poisonous attacks.
Plague Doctor
| Life | Str | Agi | Prot | Move | Vision | Floors |
|---|---|---|---|---|---|---|
| 4 | 1 | 1 | 0 | 1 | 5 | 6 |
Spreads poison.
Fire Imp
| Life | Str | Agi | Prot | Move | Vision | Floors |
|---|---|---|---|---|---|---|
| 4 | 2 | 2 | 0 | 1 | 7 | 6–7 |
A caster. Hurls fire bolts from up to 5 tiles away, then waits 2 turns before casting again. Fire ignores armor.
Mecha Golem
| Life | Str | Agi | Prot | Move | Vision | Floors |
|---|---|---|---|---|---|---|
| 20 | 3 | 1 | 3 | 1 | 6 | 7 |
A walking wall with heavy armor. Use Fire or Magic damage, which ignores its Protection.
Minotaur
| Life | Str | Agi | Prot | Move | Vision | Floors |
|---|---|---|---|---|---|---|
| 16 | 4 | 1 | 1 | 1 | 6 | 7 |
Huge life and the hardest hitter in the mid-game. Don't trade blows with it at low health.
Deep Floors (8–10)
Frost Wraith
| Life | Str | Agi | Prot | Move | Vision | Floors |
|---|---|---|---|---|---|---|
| 6 | 2 | 2 | 0 | 1 | 7 | 8–9 |
A caster that fires freezing bolts from up to 5 tiles away (3-turn cooldown). Being frozen while other monsters close in is deadly.
Licker
| Life | Str | Agi | Prot | Move | Vision | Floors |
|---|---|---|---|---|---|---|
| 6 | 3 | 1 | 0 | 2 | 6 | 8–10 |
Fast and hard-hitting. Often comes in packs.
Cultist
| Life | Str | Agi | Prot | Move | Vision | Floors |
|---|---|---|---|---|---|---|
| 6 | 1 | 1 | 0 | 1 | 7 | 8–10 |
A summoner. Raises skeletons (up to 3) every 4 turns and throws shadow bolts in between. Kill it first.
Bone Knight
| Life | Str | Agi | Prot | Move | Vision | Floors |
|---|---|---|---|---|---|---|
| 12 | 4 | 2 | 2 | 1 | 6 | 9–10 |
An elite undead warrior. The Skull King summons two of them in his final phase.
Special Monsters
Mimic
| Life | Str | Agi | Prot | Move | Vision | Floors |
|---|---|---|---|---|---|---|
| 10 | 3 | 1 | 1 | 1 | 2 | 3–9 |
Disguised as a treasure chest. It sits perfectly still until you stand next to it or attack it, then it bites. Its life bar is hidden while it's disguised.
Tip: if a chest is in an odd spot, throw a rock at it first.
Summoned Monsters
Monsters raised by Cultists or bosses give no XP, so you can't farm them.
Bosses
Demon Knight (Floor 5)
| Life | Str | Agi | Prot | Move | Vision | Size |
|---|---|---|---|---|---|---|
| 45 | 3 | 2 | 1 | 1 | 8 | 2×2 tiles |
The guardian of the Hall of the Demon Knight. It sleeps until it notices you. Its health shows in a big boss bar at the top of the screen. All of its attacks deal Fire damage, which ignores armor.
Phase 1
- Every 4 turns, if you're within 9 tiles, it unleashes a ring of hellfire: 12 fireballs flying outward. The game pauses while they fly.
- Otherwise it hits you with a fiery melee attack if you're adjacent, or walks toward you.
Phase 2 (below half health)
- Summons 3 Demon Children.
- The hellfire ring now comes every 3 turns and has 18 fireballs.
Strategy
- "Keep your distance from its ring of hellfire... or close in and finish it." (the sign on Floor 5)
- Count its turns. Get into a gap between fireballs, or get close and burst it down between rings.
- Bring Healing Potions. Fire ignores your armor, so Protection won't help here.
- The stairs down only appear once it's dead.
Skull King (Floor 10, Final Boss)
| Life | Str | Agi | Prot | Move | Vision | Size |
|---|---|---|---|---|---|---|
| 90 | 4 | 2 | 1 | 1 | 9 | 2×2 tiles |
The ruler of the depths. His attacks deal Poison damage.
Unholy Resistance
- He takes only half damage from anything that isn't Holy.
- Holy damage is doubled against him.
- A glowing holy boulder sits near the Floor 10 entrance. Break it to claim the Holy Septre (5 Magic damage, Holy).
- Other holy sources: Angel Sword, Silver Arrows, Holy Water, and the Naked class's divine smite.
Phase 1
- Plague Nova: every 5 turns, if you're within 3 tiles, he poisons everything near him.
- Shadow bolts: every other turn, if he can see you, he fires a shadow bolt.
- Otherwise he attacks in melee or walks toward you.
Phase 2 (below 66% health)
- Raises 3 Skeleton Warriors.
Phase 3 (below 33% health)
- Summons 2 Bone Knights.
- Gets a second action every turn.
- His Plague Nova and shadow bolts get stronger with each phase.
Strategy
- Get the Holy Septre first. Fighting him without holy damage takes twice as long.
- Bring Antidotes or an Elixir for the Plague Nova.
- Deal with his summons quickly, or keep them busy with your own undead (Necromancer).
- Save your best potions for Phase 3, when he acts twice a turn.
Weapons
Weapon Basics
- Your melee damage = weapon damage + your Strength.
- Two-handed weapons take both hands: your shield or off-hand item does nothing while you wield one.
- Reach 2 weapons hit enemies two tiles away, straight or diagonal.
- Wands and staves cast a bolt at a visible enemy for a magic cost.
- Magic and Fire damage ignore armor.
Swords & Daggers
| Weapon | Damage | Type | Notes |
|---|---|---|---|
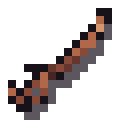 Rusty Shiv | 1 | Normal | Barely better than bare fists. |
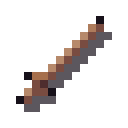 Dagger | 1 | Normal | Simple and effective. Starting weapon for the Necromancer. |
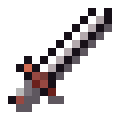 Sword | 2 | Normal | Sharp and swift. Starting weapon for the Knight. |
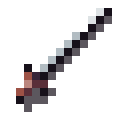 Rapier | 2 | Normal | +1 Agility while held. |
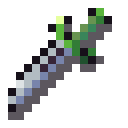 Venom Dagger | 2 | Poison | Every hit poisons. |
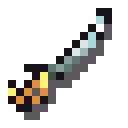 Poison Sword | 2 | Poison | Eternally dipped in poison. |
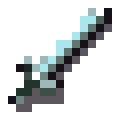 Icy Sword | 2 | Freeze | Hits can freeze enemies solid. |
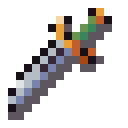 Vampiric Dagger | 2 | Normal | 1 in 3 chance to heal you for 1 on a hit. |
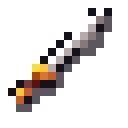 Broadsword | 3 | Normal | Wide, well-balanced blade. |
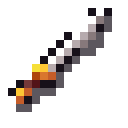 Flaming Sword | 3 | Fire | Fire ignores armor. |
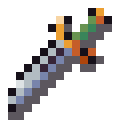 Angel Sword | 5 | Magic | Holy. A heavenly choir can be heard while wielding it. |
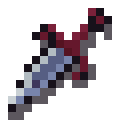 Demon Blade | 5 | Fire | Burns with hellfire that ignores armor. |
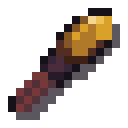 Holy Septre | 5 | Magic | Holy. Double damage to the Skull King. Found on Floor 10. |
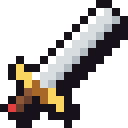 Great Sword | 5 | Normal | Two-handed. |
Axes, Maces & Hammers
| Weapon | Damage | Type | Notes |
|---|---|---|---|
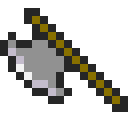 Hand Axe | 2 | Normal | A woodsman's axe. |
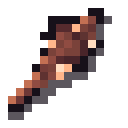 Spiked Club | 2 | Normal | Crude but honest. |
| Mace | 2 | Normal | The primary weapon of orcs. Sold by the Blacksmith. |
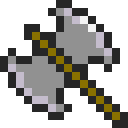 Battle Axe | 3 | Normal | Built for a real warrior. |
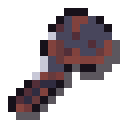 Morning Star | 3 | Normal | Crushes through bone. |
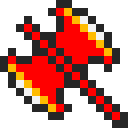 Fire Axe | 3 | Fire | Burns like hell. |
 Icy Axe | 3 | Freeze | Cold as ice. |
| Magical Mace | 4 | Magic | Magic that ignores armor. Sold by the Blacksmith. |
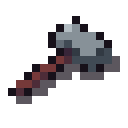 War Hammer | 5 | Normal | Two-handed. |
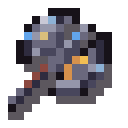 Executioner's Axe | 6 | Normal | Two-handed. The hardest-hitting weapon in the game. |
Polearms & Reach Weapons
| Weapon | Damage | Type | Notes |
|---|---|---|---|
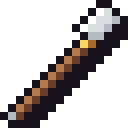 Spear | 3 | Normal | Reach 2. |
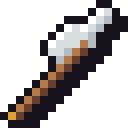 Halberd | 4 | Normal | Reach 2. Two-handed. |
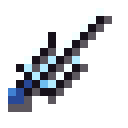 Frost Trident | 3 | Freeze | Reach 2. Two-handed. Hits can freeze. |
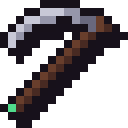 Reaper's Scythe | 4 | Normal | Two-handed. Each swing also hits every other enemy next to you. |
Bows & Arrows
Put arrows in your off-hand slot, hold a bow, and throw (right-click / RT) to shoot. The bow's damage is added to the arrow's. All bows are two-handed. You can also throw arrows by hand without a bow.
| Bow | Damage |
|---|---|
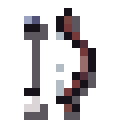 Short Bow | 2 |
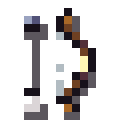 Long Bow | 3 |
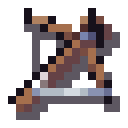 Crossbow | 4 |
| Arrow | Damage | Type | Notes |
|---|---|---|---|
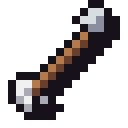 Arrow | 2 | Normal | |
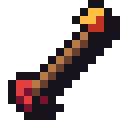 Fire Arrow | 2 | Fire | Ignores armor. |
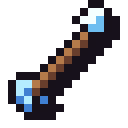 Frost Arrow | 2 | Freeze | Freezes what it hits. |
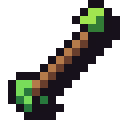 Poison Arrow | 2 | Poison | Poisons what it hits. |
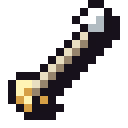 Silver Arrow | 3 | Magic | Holy. Double damage to the Skull King, ignores armor. |
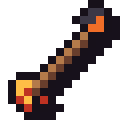 Explosive Arrow | 3 | Fire | Explodes in a 3×3 area. Careful! |
Throwing Weapons
Hold it in your hand and throw (right-click / RT).
| Item | Damage | Type | Notes |
|---|---|---|---|
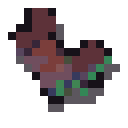 Rock | 1 | Normal | Can crack boulders. Starting weapon for the Naked class. |
| Throwing Knife | 3 | Normal | |
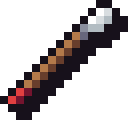 Javelin | 4 | Normal | Hits hard. |
| Bomb | 4 | Fire | Explodes in a 3×3 area. Breaks boulders. |
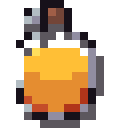 Fire Flask | 3 | Fire | Bursts into flames in a 3×3 area. |
 Frost Bomb | 1 | Freeze | Freezes everything in a 3×3 area for 3 turns. |
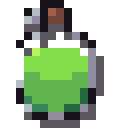 Poison Flask | 2 | Poison | A choking cloud poisons a 3×3 area. |
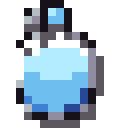 Holy Water | 4 | Magic | Holy. Double damage to the Skull King. |
Wands
Click (or target and press RB) a visible enemy to cast. Wands cost 1 magic per cast.
| Wand | Damage | Type | Notes |
|---|---|---|---|
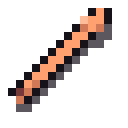 Frail Wand | 1 | Magic | Starting weapon for the Mage. |
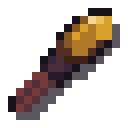 Wand of Sparks | 2 | Magic | Magic ignores armor. |
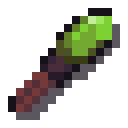 Venom Wand | 2 | Poison | Poison bolt. |
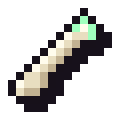 Bone Wand | 2 | Magic | Shadow bolts. Necromancer: +1 damage. |
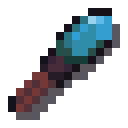 Frost Wand | 2 | Freeze | Freezing bolt. |
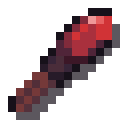 Fire Wand | 4 | Fire | Fireball. |
Staves
| Staff | Damage | Type | Magic cost | Notes |
|---|---|---|---|---|
 Apprentice Staff | 2 | Magic | 1 | +2 max magic while held. |
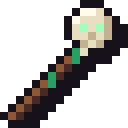 Staff of the Grave | 3 | Magic | 1 | Shadow bolts. Necromancer: Raise Dead calls one extra undead. |
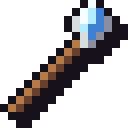 Staff of Winter | 3 | Freeze | 2 | Freezes its target. |
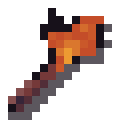 Staff of Embers | 4 | Fire | 2 | Fireballs. Ignores armor. |
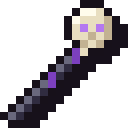 Lich Staff | 5 | Magic | 2 | Life-draining shadow bolts. Necromancer: +1 undead, and they last 5 turns longer. |
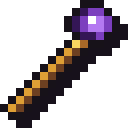 Archmage Staff | 6 | Magic | 2 | +3 max magic while held. |
Armor & Shields
Body Armor
| Armor | Protection | Notes |
|---|---|---|
 Mage Robe | 0 | +3 max magic. Starting armor for the Mage. |
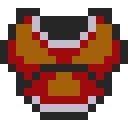 Leather Armor | 1 | Light and comfortable. Starting armor for the Knight. |
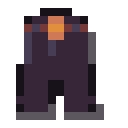 Necromancer's Shroud | 1 | +3 max magic. Necromancer: undead last 3 turns longer. |
 Shadow Cloak | 1 | +2 Agility. |
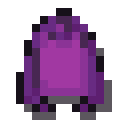 Archmage Vestments | 1 | +5 max magic and +1 spell damage. |
 Chain Mail | 2 | Great against swords and arrows. |
 Icy Plate | 3 | Full plate armor. |
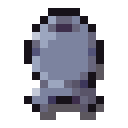 Scale Mail | 3 | Solid protection. |
 Obsidian Plate | 5 | The best armor in the game. |
Shields & Off-Hand Items
Off-hand items go in the shield slot. They do nothing while you hold a two-handed weapon.
| Item | Protection | Notes |
|---|---|---|
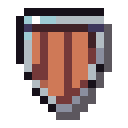 Wooden Shield | 1 | Starting shield for the Knight. |
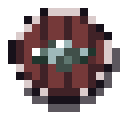 Buckler | 1 | +1 Agility. |
 Metal Shield | 2 | |
 Spiked Shield | 2 | Monsters that hit you in melee take 1 damage. |
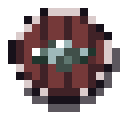 Heaven Shield | 3 | A blessed tower shield. |
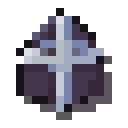 Tower Shield | 4 | Huge protection, but −1 Agility. |
 Death Shield | 5 | Forged in hell. The best shield in the game. |
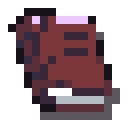 Grimoire | 0 | +3 max magic and +1 spell damage. |
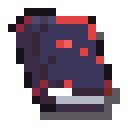 Book of the Dead | 0 | +2 max magic. Necromancer: undead last 4 turns longer. |
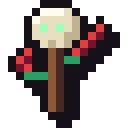 Bone Totem | 1 | Necromancer: your undead hit 1 harder. |
Knight tip: any shield also triggers the Knight's Bulwark passive (+1 Protection).
Trinkets
How Trinkets Work
You have two trinket slots. Trinkets give their bonus only while worn. Gear bonuses are recalculated every turn, so swapping gear can't stack bonuses.
All Trinkets
| Trinket | Effect |
|---|---|
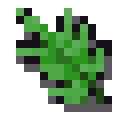 Four-Leaf Clover | +1 Agility. Feeling lucky? |
 Ring of Might | +1 Strength. |
 Ring of Vitality | +3 max life. |
 Ring of Wisdom | +3 max magic. |
 Ring of Regeneration | Heals 1 life every 8 turns. |
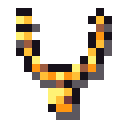 Amulet of Warding | +1 Protection. |
 Seer's Eye | +2 Vision. |
 Mana Crystal | Regain magic twice as fast. Even a Knight or a Naked character slowly regains magic with one. |
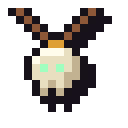 Skull Talisman | +1 max magic. Necromancer: Raise Dead calls one extra undead. |
Permanent Relics
Relics aren't worn. Use them from your inventory for a permanent bonus that lasts the rest of the run.
| Relic | Effect |
|---|---|
| Heart Crystal | Permanently +2 max life. |
 Ring of Protection | Fuses to your finger. Permanently +1 Protection. |
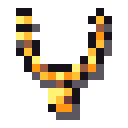 Amulet of Agility | Permanently +1 Agility (hit more, dodge more). |
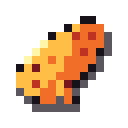 Phoenix Feather | Keep it in your backpack. The first time you would die, you rise again with half your life, and poison and freezing are cleared. The feather burns away. |
Consumables
Potions
| Potion | Effect |
|---|---|
| Healing Potion | Restores all your life. |
 Magic Potion | Restores all your magic. |
| Antidote | Cures poison and heals 1. |
 Soul Gem | Crush it to restore 5 magic. |
| Elixir | Fully restores life and magic, and cures all ailments. |
 Potion of Life | Permanently +1 max life. |
 Potion of Energy | Permanently +2 max magic. |
 Potion of Strength | Permanently +1 Strength. |
 Potion of Vision | Permanently +1 Vision. |
Food
| Food | Effect |
|---|---|
 Tomato | Heals 1. |
 Strawberry | Heals 2. |
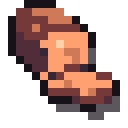 Bread | Heals 2. |
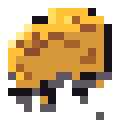 Cheese | Heals 3. |
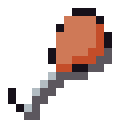 Turkey Leg | Heals 4. |
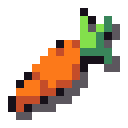 Carrot | +1 Vision. |
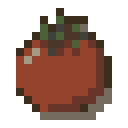 Rotten Tomato | Random: usually heals 1, but might hurt you or poison you. |
Scrolls & Tomes
Anyone can read these, whatever their class.
| Item | Effect |
|---|---|
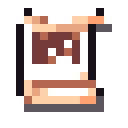 Scroll of Mapping | Reveals the whole layout of the current floor on your map. |
 Scroll of Teleport | Teleports you to a random spot on this floor. |
 Scroll of Raise Dead | Two skeletons rise to fight beside you for 12 turns. |
| Tome of Mending | Fully heals you. |
 Tome of Flames | Engulfs every enemy you can see in flames (4 Fire damage). |
 Tome of Frost | Freezes every enemy you can see for 3 turns. |
 Tome of Passage | Teleports you right next to the stairs down. |
Keys & Currency
| Item | Use |
|---|---|
| Key | Opens a locked door (used up). Stacks up to 5. |
 Gold Coin | The Blacksmith trades 20 for a Ruby. |
 Gold Bar | The Blacksmith trades 5 for a Jewel. |
| Ruby | Blacksmith currency. Found on the floor and inside boulders. |
| Jewel | Rarer Blacksmith currency. |
Loot
Where Loot Comes From
- Chests, including the better gold chests.
- Items lying on the floor.
- Monster drops. Elites always drop something good. Summoned monsters and undead allies drop nothing.
- Boulders (rubies).
- The Blacksmith.
Loot Tiers
Items are grouped into five tiers. Deeper floors and gold chests roll from higher tiers.
| Tier | Highlights |
|---|---|
| 1 (common) | Healing Potions, food, Arrows, Keys, Dagger, Hand Axe, Wooden Shield, Leather Armor, Short Bow, Javelin, Wand of Sparks, Bone Wand, Apprentice Staff, Buckler, Mage Robe, Four-Leaf Clover, Scroll of Teleport |
| 2 (uncommon) | Sword, Spear, Battle Axe, Metal Shield, Chain Mail, Bombs, Rapier, Broadsword, Morning Star, Venom Dagger, Long Bow, special arrows, flasks, Frost Wand, Venom Wand, Spiked Shield, Grimoire, Bone Totem, Necromancer's Shroud, Scale Mail, the stat rings, Amulet of Warding, Seer's Eye, Soul Gem |
| 3 (rare) | Elixir, Flaming Sword, Icy Axe, War Hammer, Heaven Shield, Icy Plate, Potions of Life and Strength, Tomes, Fire Wand, Magical Mace, Vampiric Dagger, Great Sword, Executioner's Axe, Halberd, Frost Trident, Reaper's Scythe, Crossbow, Silver and Explosive Arrows, Holy Water, the elemental staves, Tower Shield, Book of the Dead, Archmage Vestments, Shadow Cloak, Skull Talisman |
| 4 (epic) | Heart Crystal, Ring of Protection, Amulet of Agility, Potion of Energy, Ring of Regeneration, Mana Crystal, Phoenix Feather |
| 5 (legendary) | Death Shield, Obsidian Plate, Angel Sword, Demon Blade, Executioner's Axe, Archmage Staff, Lich Staff, Archmage Vestments, Phoenix Feather |
Class Loot Bias
| Class | Bias |
|---|---|
| Knight | 55% of arcane gear is re-rolled into weapons and armor. |
| Mage | 70% of steel weapons, shields and heavy armor are re-rolled into staves, wands, robes and books. |
| Necromancer | Same as the Mage, but also favours necromantic gear. |
| Naked | No bias. |
Tips & Strategy
General Tips
- Fight in corridors and doorways so fewer enemies can reach you at once.
- Use the map (M). A Scroll of Mapping reveals the whole floor.
- Search (F) near dead ends for hidden doors and rooms.
- Don't hoard healing. A Healing Potion restores all your life, so drink one before a dangerous fight, not after.
- Level ups fully heal you. If you're about to level, finishing one more kill can save a potion.
- Campfires heal you for free. Rest at them before moving on.
- Throw things. Rocks, knives and javelins soften enemies before they reach you.
Dealing With Dangerous Enemies
- Armored enemies (Mecha Golem, Bone Knight, Skeleton Warrior): use Fire or Magic damage, which ignores armor.
- Casters (Fire Imp, Frost Wraith, Cultist): break line of sight, then ambush them around a corner. Kill Cultists before they build an army.
- Blast Beetles: kill them from range, or step away before they reach you.
- Archers: close the distance fast or fight them around corners.
- Mimics: test suspicious chests with a thrown rock.
Preparing for the Bosses
- Demon Knight: bring Healing Potions (fire ignores armor), and learn the timing of the hellfire ring.
- Skull King: grab the Holy Septre from the glowing boulder first. Bring Antidotes or an Elixir, and keep a Silver Arrow or Holy Water stash if you use them.
Languages & Accessibility
Supported Languages
- English
- Français (French)
- Deutsch (German)
- Español (Spanish)
- Português (Portuguese)
Controller Notes
- Most controllers are supported: Xbox, PlayStation, Switch and generic pads.
- The mouse cursor hides itself while you play on a controller.
- Input is paused while the Steam overlay is open.
- Controller rumble is supported.